
Client Settings - Account Manager
How to get to Account Manager
Steps to follow:
1. You can either get here from clicking on Continue button in Step 1 of Client Settings.
or,
2. Follow the steps as:
| i. Click on Settings menu from Side menu bar and Click on Edit Project menu | 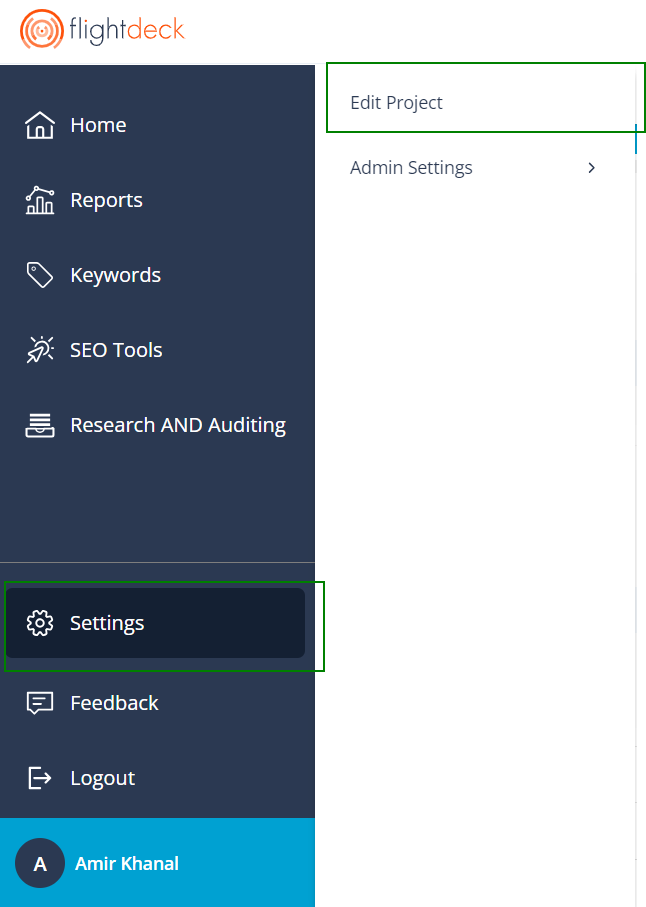  |
| ii. Click on Account Manager from stepper; or Click on Continue button in Step 1 | |
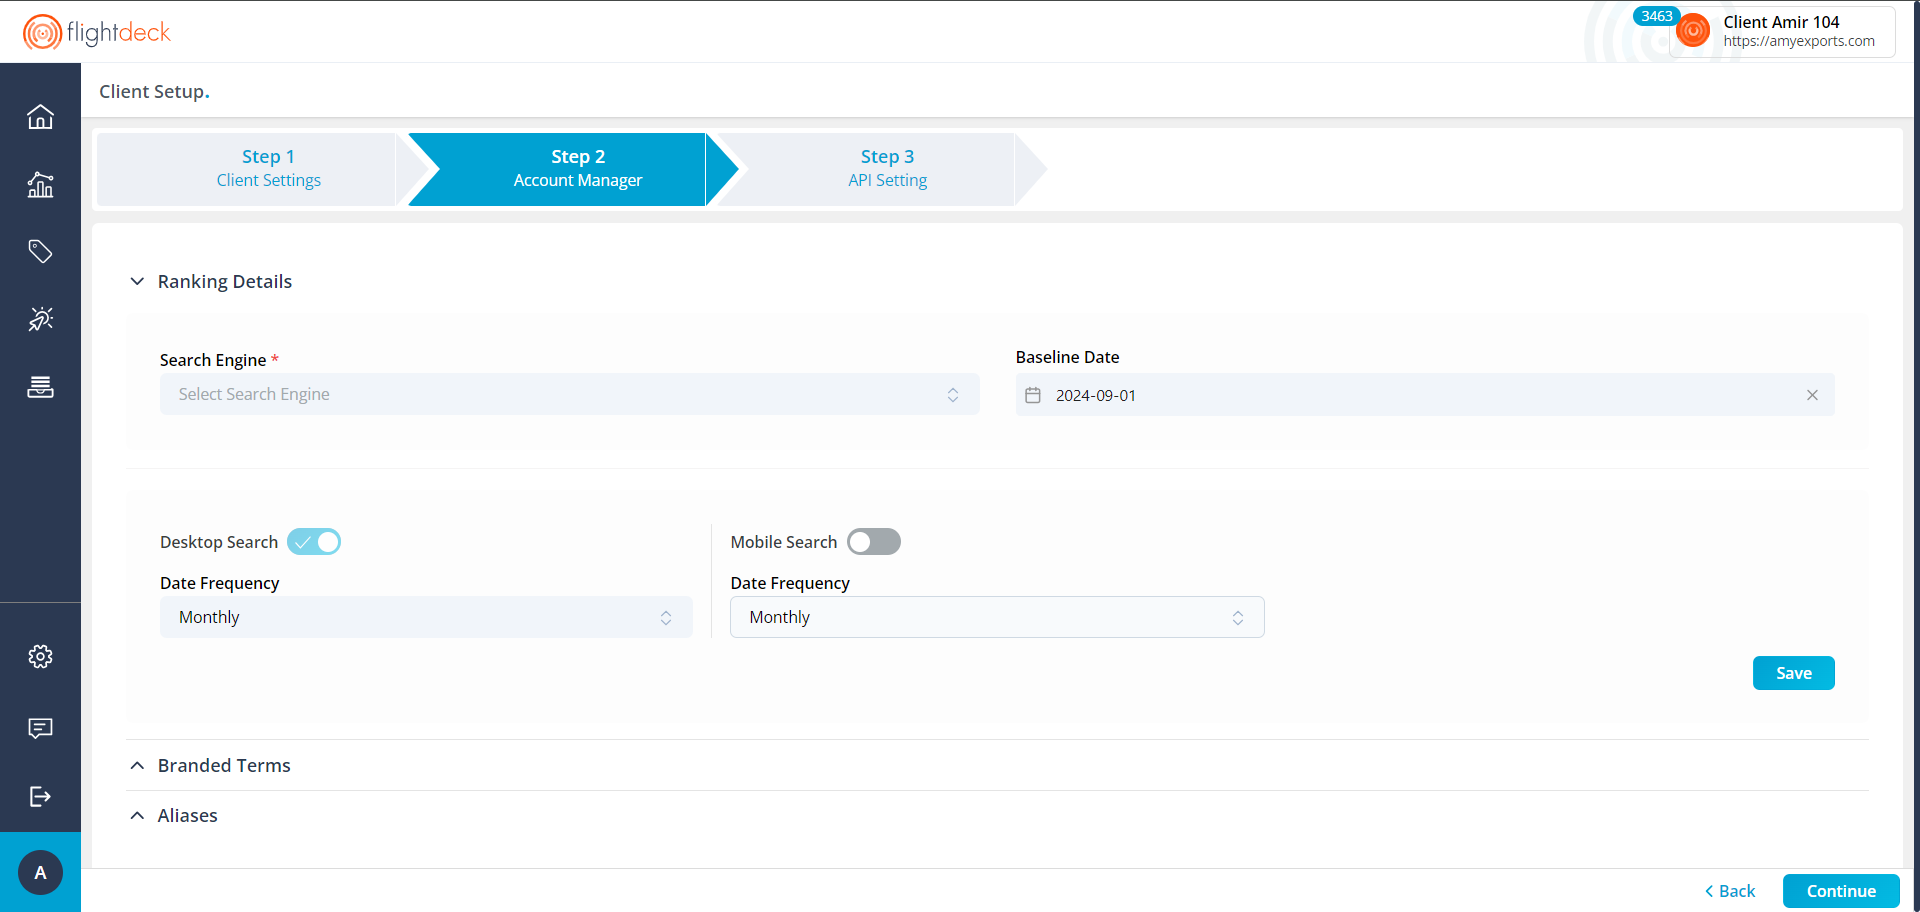 | |
Ranking Details Configurations
Here, you can add Search Engine, Baseline Date, Ranking configurations for Desktop Search and Mobile Search
A. Adding/Editing Search Engines
On default, nothing is selected in Search Engine drop down.
Search Engine selection for the Client can be limited by the Role Constraint in which the user is present.
Steps to follow:
| 1. Click on Search Engine Drop-down to select the Search Engine based on your Region of choice | 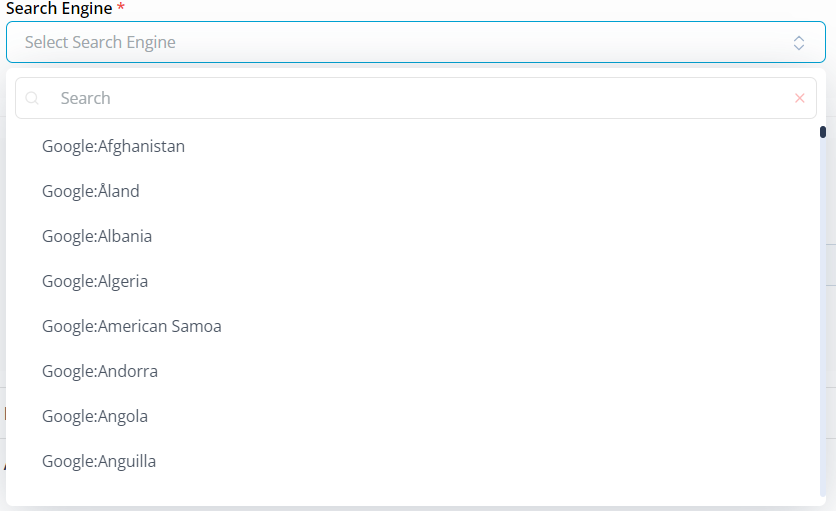 |
| 2. You can select Multiple Search Engine Regions; after selecting the search engine from drop-down it will be staged for Saving.(You can always add or remove Search Engine; by doing so the client is sent for queuing and it may affect the calculated data) |  |
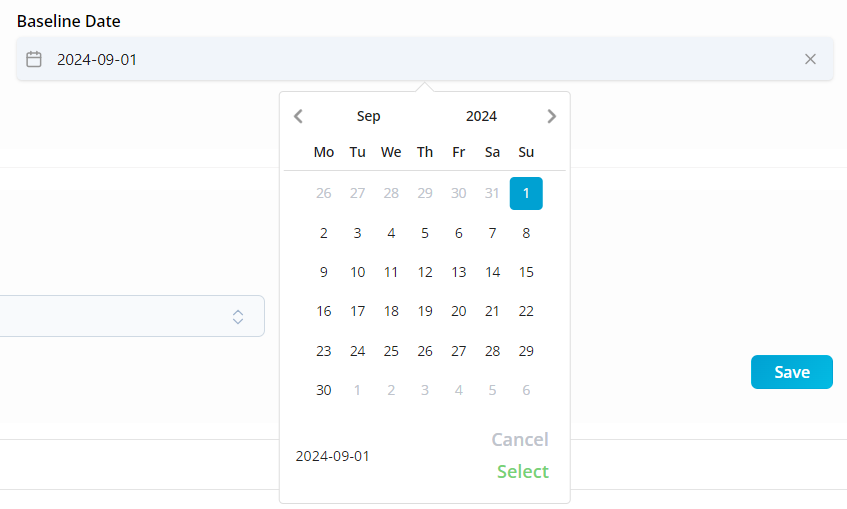
| 3. Here, on default Baseline Date is Start of the month of the Client Creation Date.(You can always change the baseline date; by doing so the client is sent for queuing and it may affect the calculated data) | |
| 4. Click on Save button.(By doing so, the client is sent for queuing) | |
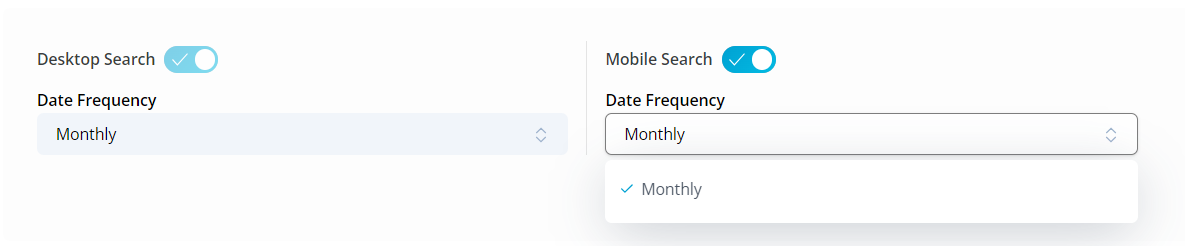
By default Desktop Search is Enabled for the client; with Monthly Frequency.
B. Altering the Baseline Date
Baseline Date determines from which date do you want to queue your client for data calculations.
|  |
| |
C. Enabling/Disabling Desktop Search and Mobile Search
By Default, the Desktop Search with Frequency Monthly is selected.
1. Desktop Search cannot be disabled for the Client; but the frequency can be altered.

2. Mobile Search when Enabled; Only the Monthly Frequency can be selected.
3. Click on Save button to save the changes in Ranking Details section.
By Changing the Ranking Configurations for Desktop and Mobile Rankings results the Client to re-queue for Calculations.
Add/Delete Branded Terms
Expand the Branded terms section to add, view and delete the branded terms.

1. Enter the Branded Terms and Click on Add Item to add the branded terms.

2. Click on Delete button beside the Branded terms to delete the branded terms.
Queue operations are not involved while adding/deleting the branded terms.
Add/Delete Alias(es)
Expand the Aliases section to add, view and delete the Alias(es) for the Client.

1. Enter the Alias URL and Click on Add Item

2. Click on Delete button beside the Alias URL.
Client is sent for Queue on each addition and removal of Alias URL